In this short tutorial, you will be led through the major parts of the DairyLive application. We will use an example herd file that you will create. This is a fictional herd of about 90 animals with about four years of lactation data. (If you create a dairy goat herd, the database will contain about 30 animals).
Click on your Windows Start menu and then select Programs. Find the DairyLive group, move your mouse to it, and then select DairyLive. DairyLive will start up momentarily.
NOTE: If you have the Homestead edition, the first time you start DairyLive, you will be prompted for the herd information for the new herd database that will be created automatically. Select whether the herd is to contain dairy cattle or dairy goats. Also select "Yes" in response to the question, "Would you like some sample data to be added to the herd database?" After you are finished with this tutorial, you can delete the sample data.
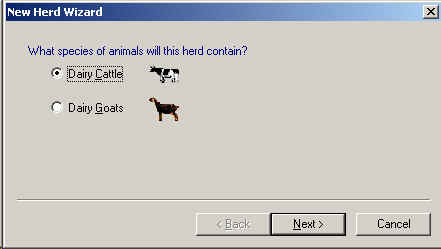
Let's create a sample herd database. Select File->New Herd and you will see the New Herd Wizard. The first screen will appear as shown below:
Select either Dairy Cattle or Dairy Goats, and click on the Next button.
Now you will see the next screen:
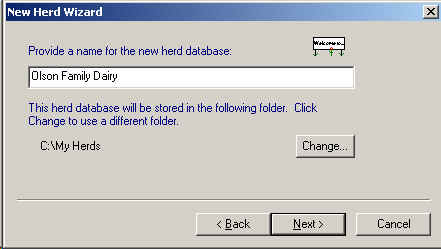
Type in a name, such as your farm name. This will become the actual name of the file that is used to store your herd database. Normally, you will want to store your herd databases in the My Herds folder. You can use a different folder by clicking on the Change button.
Now click Next to get to the next screen:
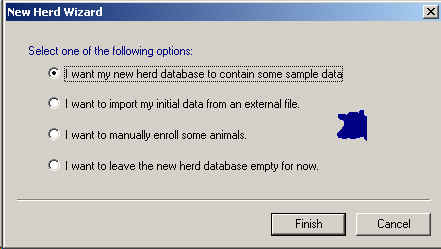
Make sure the "I want my new herd database to contain some sample data" option is selected. Click on Finish. Shortly you will see a Herd Explorer window appear as shown below:
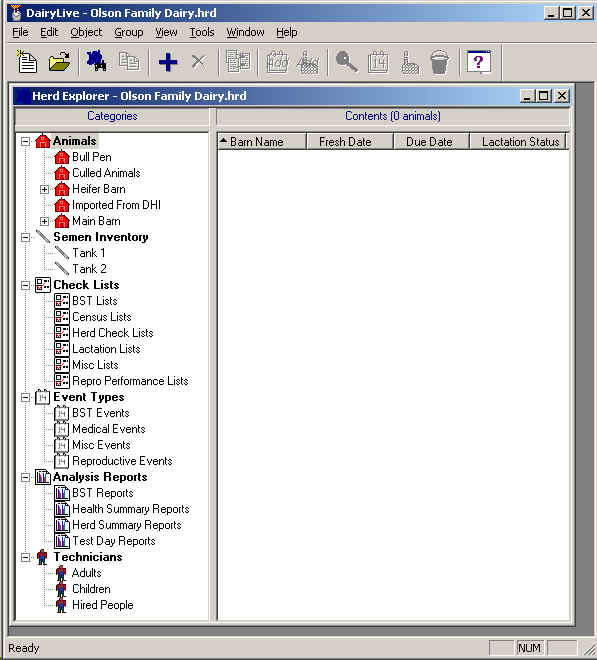
The window and text colors may be different on your machine, depending on how you have set your system colors.
The Herd Explorer is the window from which you will launch most of your activities. The object categories (or groups) on the left side are arranged in a tree. To open a branch of the tree, click on the + sign next to the name, or double-click on the item. When you select an item in the tree, all of the objects that belong to that category will be shown on the right side.
Expand the Animals category by clicking on the + sign. Then expand the Main Barn group by clicking on the + sign. Now click on Milkers. You should see something like this:
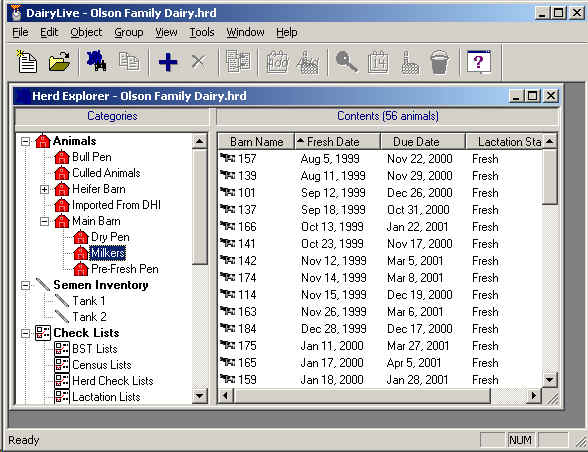
Try expanding and clicking on the other items on the left side and notice how the right side changes.
You can create new subgroups. Do this by selecting an item on the left side and then select Group->New from the main menu bar. Or, you can right-click on the item and select New from the pop-up menu. A new group will appear and you can edit the name of the group.
By default, the right side of the window is shown as a table. Each column shows basic information about the objects that are listed. You can sort on any column by simply clicking on the column header. Clicking again on the same column will cause the list to be sorted in reverse order on that column.
You can view the objects on the right side in different ways. Do this by clicking the right mouse button in the right side, but not directly on an item. You can select Large Icons, Small Icons, List, or Details.
You can move an object to a different group by "dragging" the object. Click on the object you want to move and hold the left mouse button down. Then drag it to the name of the group you want to put it into on the left side and release the mouse. You cannot move objects to different categories. For example, it doesn't make sense to move an animal to the Operator category, so you are not allowed to do this.
You can adjust the relative sizes of the left and right sides of the Explorer view by "dragging" the vertical divider between them with the mouse.
DairyLive is like many other Windows applications. Across the top, just below the title bar, there is a menu bar that gives you access to most of the major functions of the application. Some of the menus may vary slightly, depending on what the current "view" is. (A view is a window inside of the DairyLive main window. For example, the Herd Explorer is a view.)
Below the menu bar is a toolbar. The toolbar contains some of the more frequently used functions of DairyLive. The toolbar will always remain the same, but some items may be greyed out if they don't currently apply.
At the bottom of the main window is a status bar. You will see short messages here that describe menu items and toolbar buttons as you move your mouse over them.
Many of the views also have their own toolbars along the bottom of the view's window.
The Herd Explorer shows only a few things about an animal. To see more information, select an animal (make sure you have selected an animal group on the left side first) and then select Object->Open from the main menu, or, press the button that looks like a magnifying glass. You can also double-click on the animal.
This action will cause the Animal Details view to appear, as shown below:
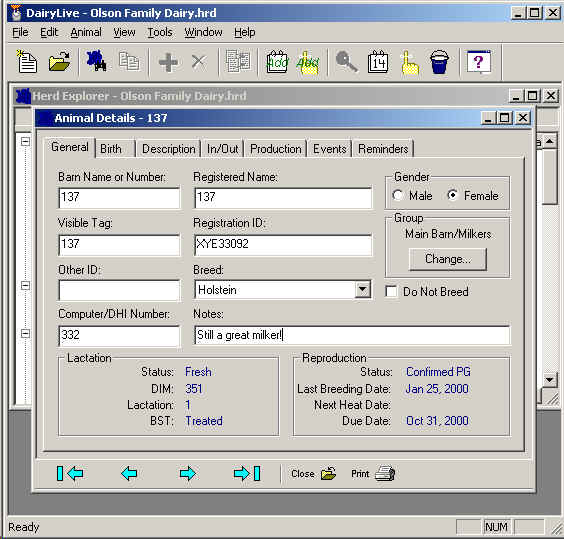
This view has seven pages. The tabs across the top allow you to move between pages. Flip through the tabs and look at what information this view contains. If you change something, it will be automatically saved when you close the window (by pressing the X in the upper right corner of the window or clicking on the Close button in the view's toolbar). You can move to the next and previous, or the last and first animals, by pressing the arrow buttons along the button of the window.
You can print an animal details report by clicking on the Print button. The report will be shown in a Print Preview view, which can then be sent to the printer.
To view the events that have happened to an animal or animals, select the animals in the Herd Explorer and then select Object->Animal->Events from the main menu, OR, press the calendar button in the main toolbar, OR, right-click on the animal and select Animal->Events from the pop-up menu. To select multiple animals, hold the control key down on your keyboard as you click on each animal.
You will see the Event View appear, which looks something like this:
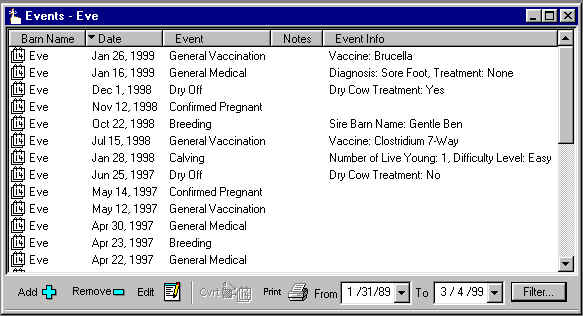
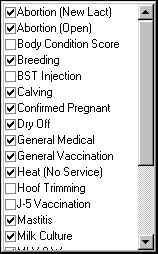
You can click on the column headings to change the sort order. You can also change the range of dates for the events to be shown by changing the dates along the bottom of the window. If you want, you can change which events are shown by pressing the Filter button and then checking or unchecking the event types you want to see:
Reminders are very much like events, except that they are expected to happen in the future. To get to the Reminder View for an animal, select Object->Animal->Reminders or press the button with the picture of a string tied around someone's finger.
See Event Types for an explanation of the standard event types.
To view an animal's lactation curve, you can go to her Animal Details window and click on the Production tab. This will show just that cow's production data.
Now go to the left side of the Herd Explorer and expand the Check Lists category. Select a check list group. Select one of the lists in that group that appears on the right side. Now select Object->Open from the main menu or right-click on the list item and select Open from the pop-up menu. Or you can double-click on the check list name. The List View looks something like this:
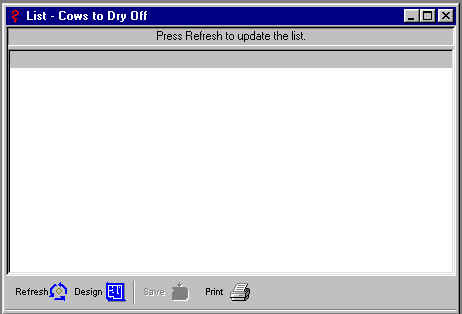
The window will be empty at first. Now click on the Refresh button and the window will change to:
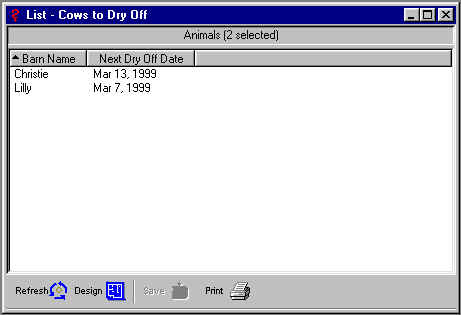
Click on the column headers to sort by different columns. You can also select animals from this list and go to the Animal Details View, the Event View, and the Lactation View, just as you did from the Herd Explorer. You can also select multiple animals and perform operations on them.
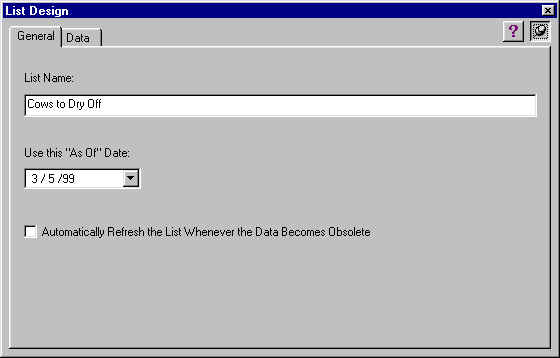
You can change the check list's setup by clicking on the Design button in the view's toolbar. You will see the List Design dialog, which has two tabs. The General page lets you enter the list's name and for what date you want the list to be generated:
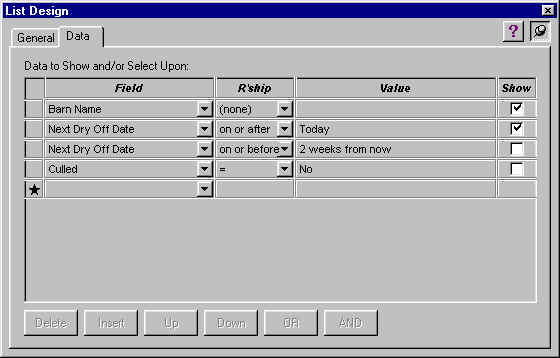
The Data tab lets you select which animal properties are shown in the list and how to select which animals are shown.
Now let's print this list out. Press the Print button on the bottom of the window. You will see a "Print Preview" window appear as follows:
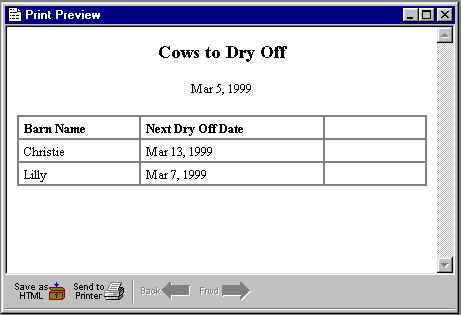
From this window you can send the list to the printer or save it as an HTML file. Notice that there is an extra blank column which you can use on the printed output for notes.
Let's suppose that we just bred one of our cows. Go to the Herd Explorer and find a cow in one of the groups. Select Object->Animal->Quick Add Event from the main menu OR right-click on the animal and then select Animal->Quick Add Event from the pop-up menu. You also press the button on the toolbar that has a picture of a calendar with a starburst superimposed over it.
You can also view the animal's events from the Animal Details window on the Events tab.
In the Add Event dialog, select an operator from the Operator list and select Breeding from the Event Type list. The dialog will now look something like this:
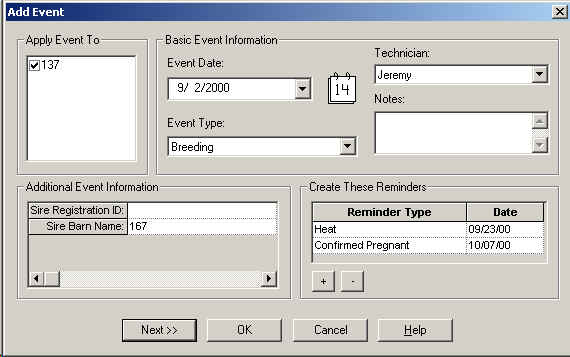
Under Additional Event Information, you are prompted for either a Sire Registration ID or a Sire Barn Name. If the sire is not part of your herd, enter the Sire Registration ID. Otherwise, select the sire barn name from the list. Now press OK and the event will be added, as well as a reminder for a Confirmed Pregnant check in 35 days and a Heat event in 21 days.
If DairyLive detects that the event "doesn't make sense," you will be warned and you can choose not to add the event. For example, if the cow had already been bred and was determined to be pregnant, you would be warned of this.
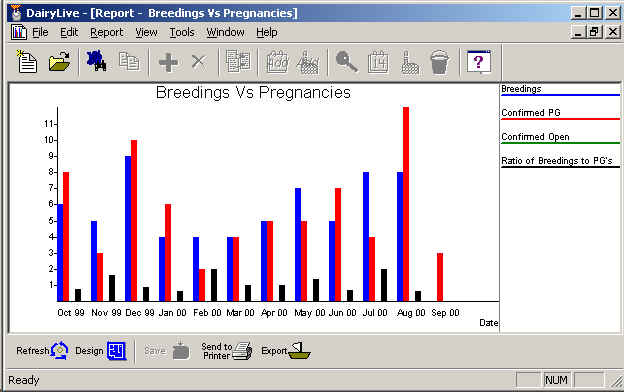
Finally, let's generate an analysis report. Again, go to the Herd Explorer. Find a report you want to generate under the Analysis Reports category. Double-click on the report and you will see a blank Report View. Press the Refresh button and after a few moments, you will see the report contents appear, something like this:
Now press the Design button. This will bring up a tabbed dialog in which you can alter the design of the report. The Report Design dialog has two pages. The General page lets you assign the report a title, and also lets you set up the date range, time interval, and reprot style. (Scatter graphs are a special kind of report. See Report View for more information about scatter graphs).
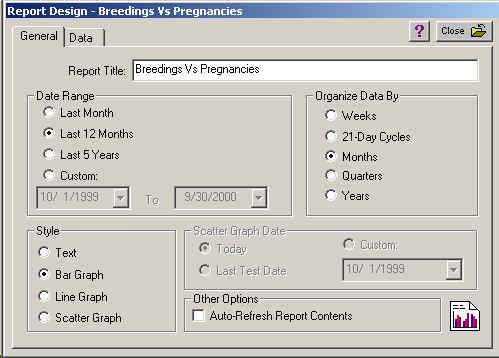
The Data page lets you select what data will be shown in the report:
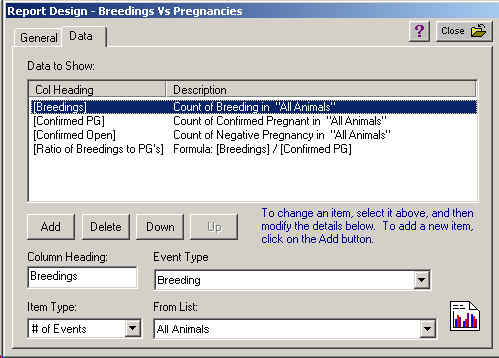
The list shows which items will be shown in the report for each time period that the report covers. To add another item, press the Add button. Provide a column heading (any text you want up to 30 characters). Also select the type of item, and, depending on the type of item, other information that applies to that item type. For example, if you select the item type called "# of Events", you'll be prompted for the event type and the check list name that you want the data to come from.
See the Report Design dialog for more information.
To import data from an external file from your DHI lab, select Tools->Import Data from the main menu bar. You will see the Import Data dialog:
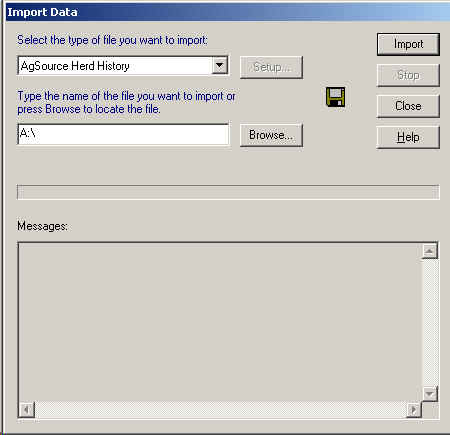
Select the type of file you want to import. This version of DairyLive supports standard transfer files, herd history files from AgSource, 310 files from AgSource, "receive" files from AgriTech, DNL file from Raleigh DRMS, initial load and monthly test data reports from Pennsylvania DHIA, and data files from BouMatic and Germainia.
To begin the import process, press Import. The progress bar will show how far along the operation is and the messages area will show any information, warning, and error messages that might be generated.
See Setting Up Your Herd for more information about setting up your herd database for the first time.